Category Archives: Design Tutorials
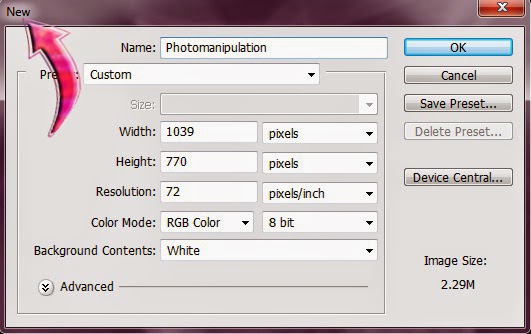
Created Special light Effects in Photoshop

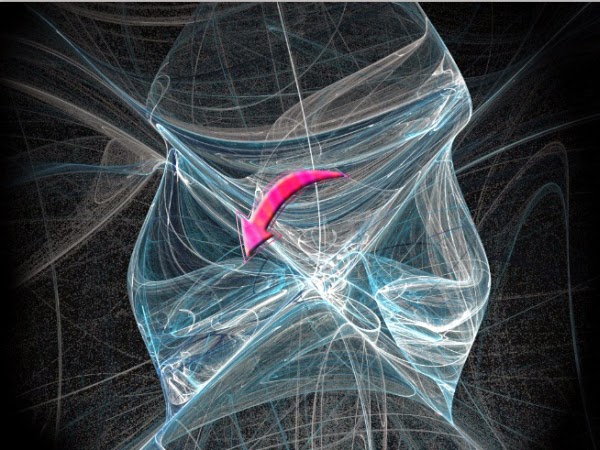
So to start, we need to have few things in our bag like player, fractal, and some space brushes. You guys can create your own fractals using Apophysis. Now we have everything we need, so let’s begin.
1.Open your Photoshop and create a new file with 1039 px width and 770px height.


How to created Skyline with Photoshop CS6
Hello friends today i have created Skyline with Photoshop CS6 in this tutorial i will show more in the Videos.

http://youtube.googleapis.com/v/5jMDQ-RpGuo&source=uds
Learn How To Create A Realistic Underwater Effect In Photoshop
Here the recourse that you need to use to create this photo
Now pick the ‘gradient tool’ to give gradient to your
background.

as ‘surface’. Select some area on this layer using ‘rectangular
marquee tool’. Use default colors, which are # 000000 as
foreground and #ffffff as background and go to Filter> Render>
Clouds.

Keep this ‘surface’ layer selected and go to Filter> Artistic>
Plastic wrap. Use the following values for plastic wrap.

fit your canvas. Duplicate this ‘surface’ layer.

portion of your canvas as shown below.

this, go to Filter> Render> Lighting effects and use ‘omni’ to
get nice effect.

blend with the background.

bit by pressing ‘Ctrl+T’. Drag it just below the original surface
portion. Use ‘Overlay’ blending mode and 50% opacity and
erase its edges to get the effect like this.

just above the gradient layer. Fill it with # 000000 color. Go to
Filter> Noise> Add noise and use the following values.

‘screen’ and opacity to 15%.
image and select its bottom part using ‘pen tool’ and click
‘Ctrl+U’ to open the ‘Hue and Saturation’ window and use the
following values to extract colors.

using ‘pen tool’ and desaturate the image exactly as done in
step 8. After this, adjust the position of both stones and rocks
images to give realistic look.

‘rocks’ image layer. Change its blending mode to ‘Linear light’
and opacity to 80%.

Create a new layer, select a square about 80% of your canvas
size, using ‘rectangular marquee tool’ and go to Filter>
Render> Clouds. Then click on Image> Adjustments>Threshold
and use the following values.

settings.

50%.
‘brush tool’ and draw them of different sizes. I added color to
few through ‘color overlay’ blending option. Collect all fishes in
a new group and reduce its opacity to 75%.That’s it, we are all
done.

underwater effect. Do share your thoughts

Mountain Brush and Painting in Photoshop
It will create a simple sky background, feel free to use your own creative techniques to improve upon this to make a more compelling sky.
It will stop before finishing the foreground, like close-up trees, flowers, shrubs, etc. These things are beyond the scope of the usefullness of the Mountain Brushes. I may create a set of brushes for that in the future to expand upon this set of tools.
Here we go:
- Create Photoshop Canvas: I think a good start is 4000pixels wide by 3000 pixels high. This is equivalent to about a 14 Megapixel photo and will be high enough resolution for many needs: Large Prints.
- Create Sky. There are many ways to acheive a Painterly Sky. For Speed, start with a Gradient Fill. 2 Colors: #7ADEED to White #FFFFFF. Drag the Gradient tool about 2/3rds of the way down the canvas. Should look like:
. .
. - Create Clouds. I’d love to go into a more advanced version of this, but that’s not the point of this tutorial. For a quick method: Use Brush tool, a standard Photoshop brush: Soft Round 300px but increase the size to 800px. Turn the opacity down to about 37%. Quickly Create about 8 basic ovals in the sky, naturally spaced, like:
. .
.
Then use the Smudge tool with its brush set to Soft Round 150px give or take, with strength of 20%, and WORK THE EDGES of those ovals until they are shaped more like Happy Little Clouds. You can also experiment with turning on and off the Finger Painting setting which applies color before smudging (have your primary color set to white). It’s kind of like working with oil paint!
(Another method is using the Liquify Tool with the Forward Warp tool to work the edges. Brush size 241, Brush density start coarse with 66 and move down to 29 as you go for the wispy stuff, Brush Pressure 66 and move down to 46. Combine this with Smudge to really get good results)
. .
. - Highlight and Darken Clouds. Pick direction of light source. I’m going with Top Left. Use Dodge and Burn to Highlight the top left of clouds and Darken the lower right of clouds. Also add dimension to clouds by defining light and dark areas. Again use Soft Round brush for Dodge and Burn and vary the brush size between 50px and 80px depending on the level of detail desired per area. Use Range: Midtones and Exposure: 31% or so. I Highlight/Dodge first and Burn second. Because the Burnt areas have a tendency to stick out more like a soar thumb, run the Smudge tool over those areas when you’re done to smooth out the shadows.
. ..
.. - Create a New Layer. Use the Brush tool Set to Mountain Brush: MountainRange. Set Opacity to 100%. Set Color to #BEEFF6 which is basically one shade of the sky color. Put the mountains where you want them, maybe a little above half the canvas. Click twice and you have mountains! Once on the left side, line up the mountains to the right, click again. Instant Mountains! But create a little fill by dragging downwards with the mountain brush to make the mountain area thicker so we can stack mountains on top of that later. Change the Layer Opacity to 84% to give it a far off distant look.
. ..
.. - Create Mist: Use a large Eraser to softly erase the mountain bottom fill. This will give it a nice mist effect towards the bottom when we stack layers on top of it. Use a 300px Soft Round Eraser.
. .
. - 2nd Mountain Range. Create New Layer. Choose a slightly darker and more purple color for the 2nd range of mountains: #83b8ee or make your own. Usebrush Mountain3 Underpaint increased to size 2500px. You only need to use it twice: once to the left and once to the right, but place the mountain ranges edge to edge. After you get the mountains layed in, fill in below with the same brush to bulk up the area. Then erase some with a 700px Soft Round for more mist.
. .
. - Overlay Mountain Details: Create New Layer. We’re going to give these mountains some details. Use brush: mountain3 overlay expanded to 2500px and set to white. Carefully Line it up to the underpaint of mountains and click it in. 2 times plus one in the middle of the 2 where there’s a little valley. Then erase some of the bottom of this to match the fade from the underpaint.
. .
. - You can create more layers of mountains, experimenting with some of the other Mountain Brushes, but for now, we’ll move on to…
- Foresty Hills 1: Create New Layer. With color #03240c, use brush: hill Foresty1 Underlayer flip to lay in the first layer of hills and trees.

- Foresty Hills 2: As Above, with color #05190a and expand brush to 1900px. When done with this layer, go back to the last layer and erase out some mist where it will show an effect
- Foresty Hills 3: As Above, with color #041108 and expand brush to 2500px. Same mist thing.
. .
.
Congratulations! You’ve completed a Photoshop Painting from scratch. Because you’ve done everything with layers you can easily continue onto a closer Foreground area by squishing all the original layers upwards and leaving you room to add your own Foreground.
